|
← BACK |
BEFORE & AFTER - EFFECTS
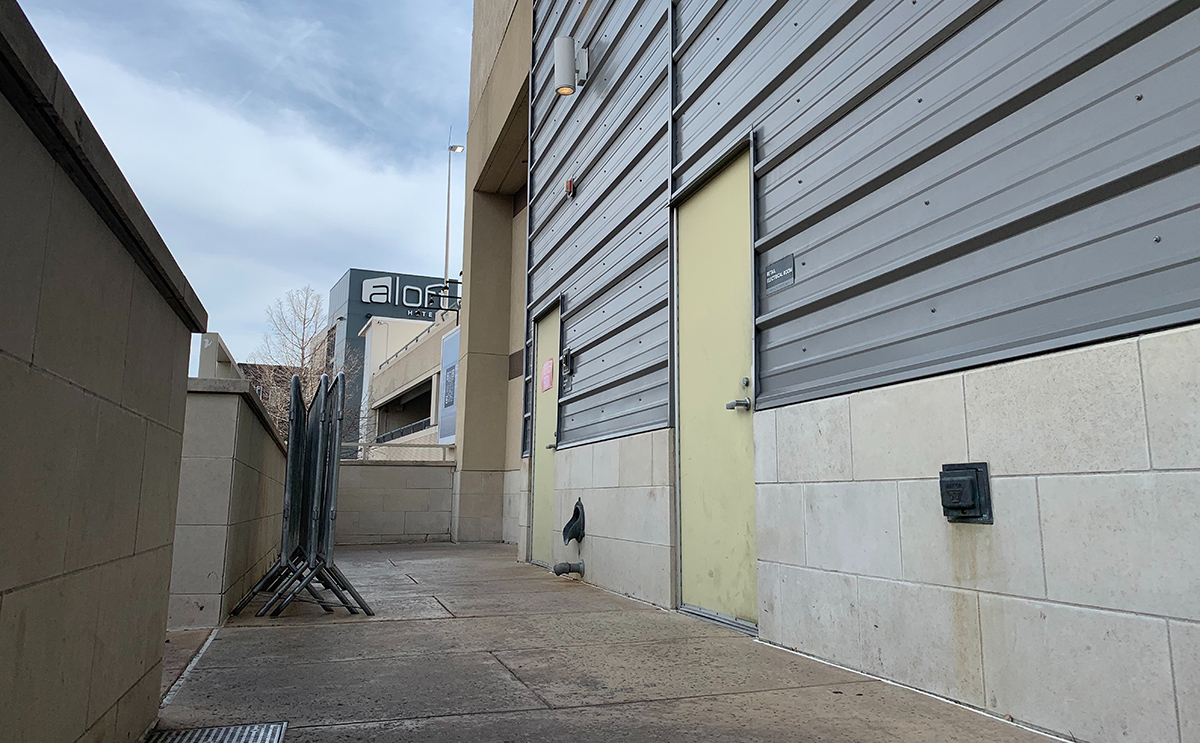
Step 1: I take a picture of a location that looks interesting to me. 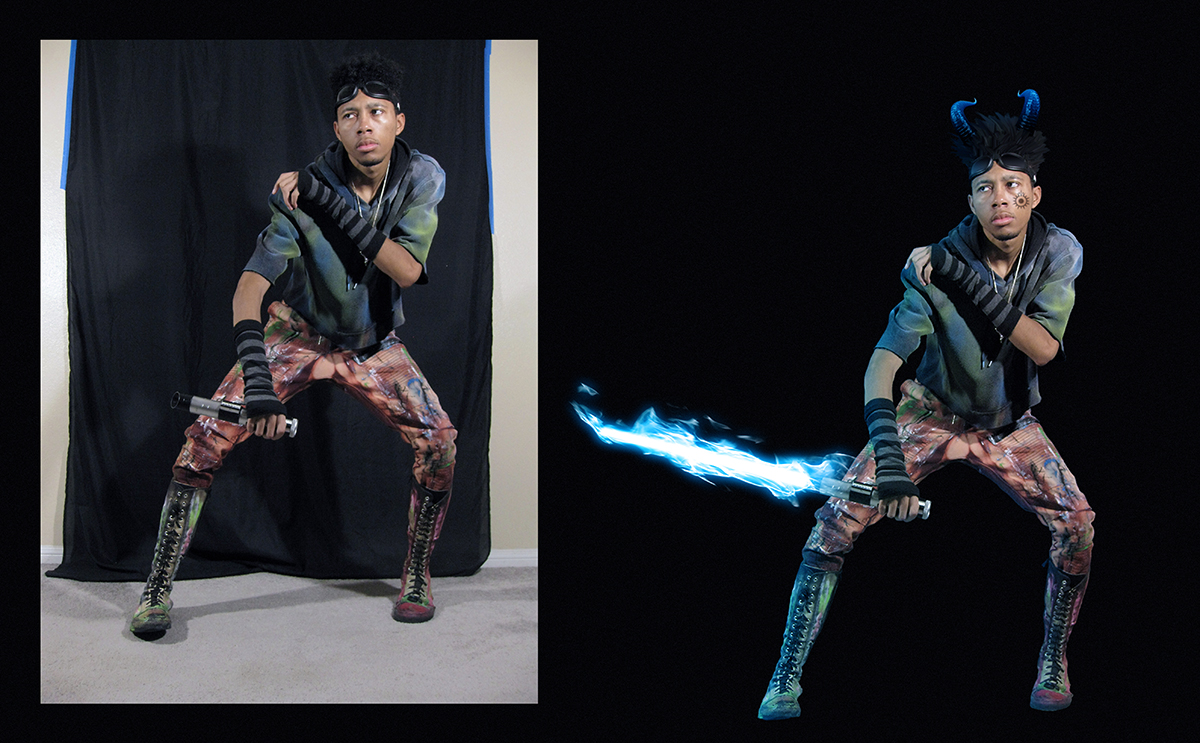
Step 2: I use the pen tool on Adobe Photoshop to cut around the object and apply overlay effects. (And yes that's me.. In the picture.) 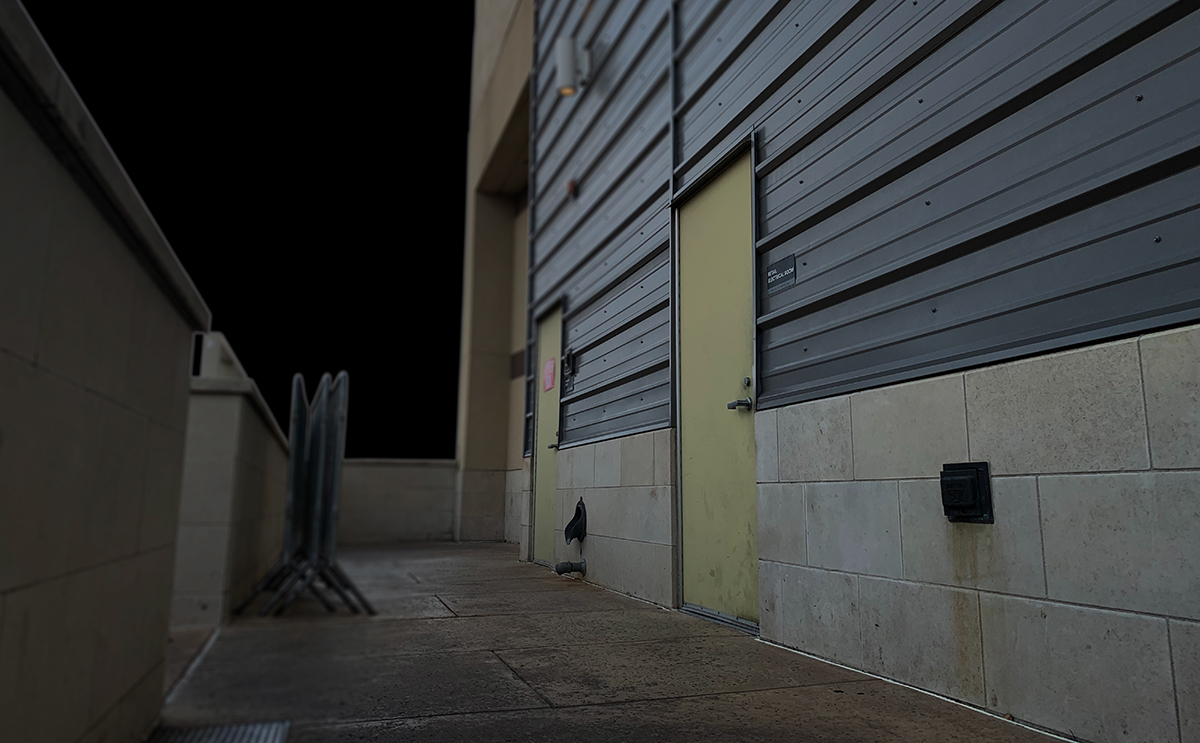
Step 3: I start editing the location by getting rid of any background interference and etc... 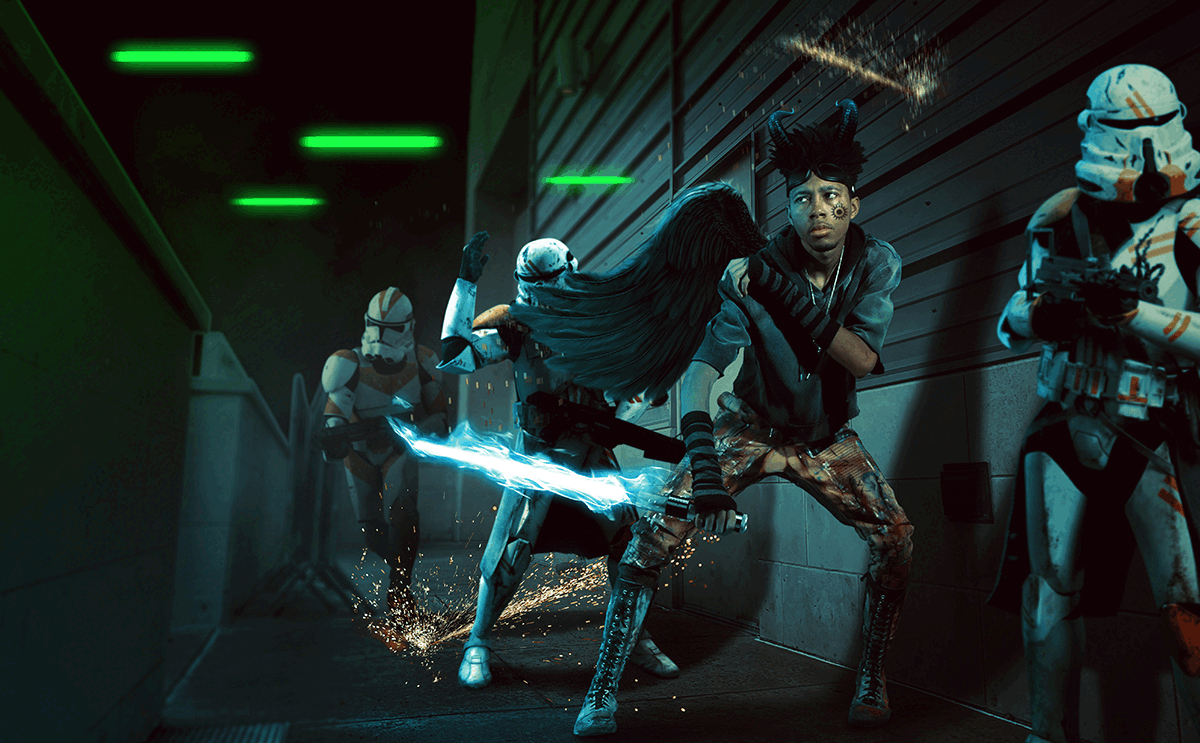
Step 4: Multiple overlays are added. This is just a quick before and after when I apply the overlays. It's a lot more complicated than it looks... Trust me! 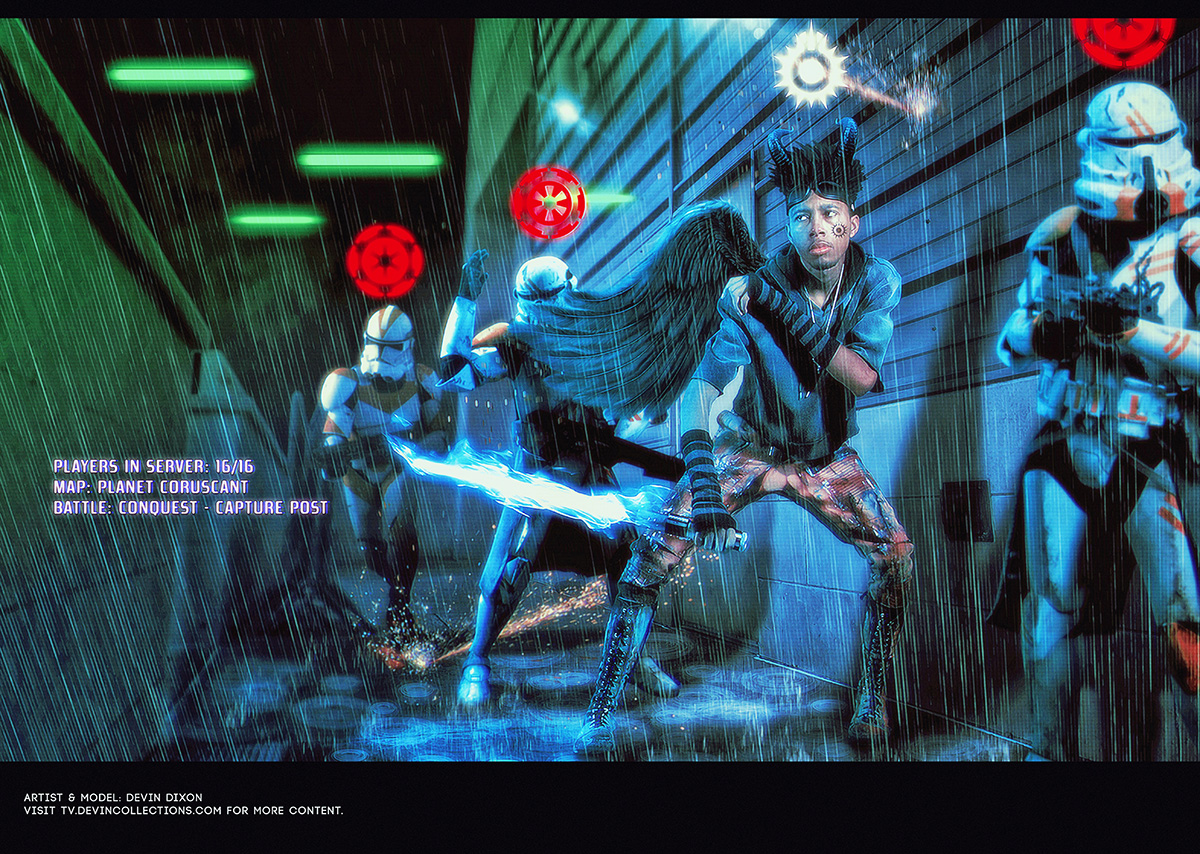
Step 5: HDR (High Dynamic Range) is applied and filters. All Done! Adobe Photoshop is a very fun tool to use. A lot of learning and patience is applied when editing photos. Example: Heres another example on a larger scale. 

|